|
"Our tool is comparable in quality to any other make of tool out there. While doing the job with the same results as any other, it remains to be less expensive." |
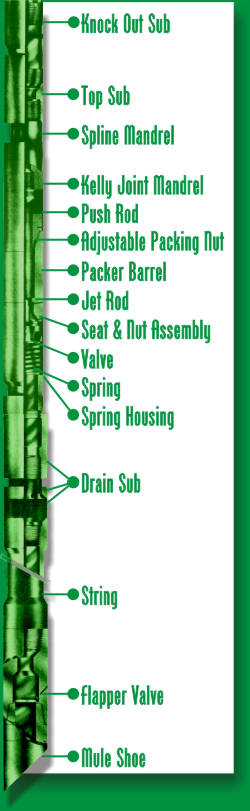
Before
running the bailer, calculate the amount of sand to be recovered.
You will need to run enough chamber between the flapper valve and
the main valve to hold twice this amount. If another
trip with bailer is necessary, the bailer can be quickly dressed
in the field by making only 2 breaks. First break spring housing
below packer barrel and remove valve assembly. Check rubber seal
for scarring. If seal is intact, it may be flipped over and run
again. Reassemble as before. Next break spline housing above packer
barrel, pull back on top section to expose push rod. Clean push
rod and apply light grease. Check tension on packing by inserting
push rod back into packer barrel. You should feel moderate tension
when pushing and pulling by hand, more tension can be applied to
packing with the adjustable packing nut. If more packing is needed,
do not remove existing packing, unscrew packing nut and add another
packing ring and replace packing nut and adjust as nessesary. Re
assemble bailer and tighten connections. |
 |
| Copyright ©2005 M&M Oil Tools |
|
|